
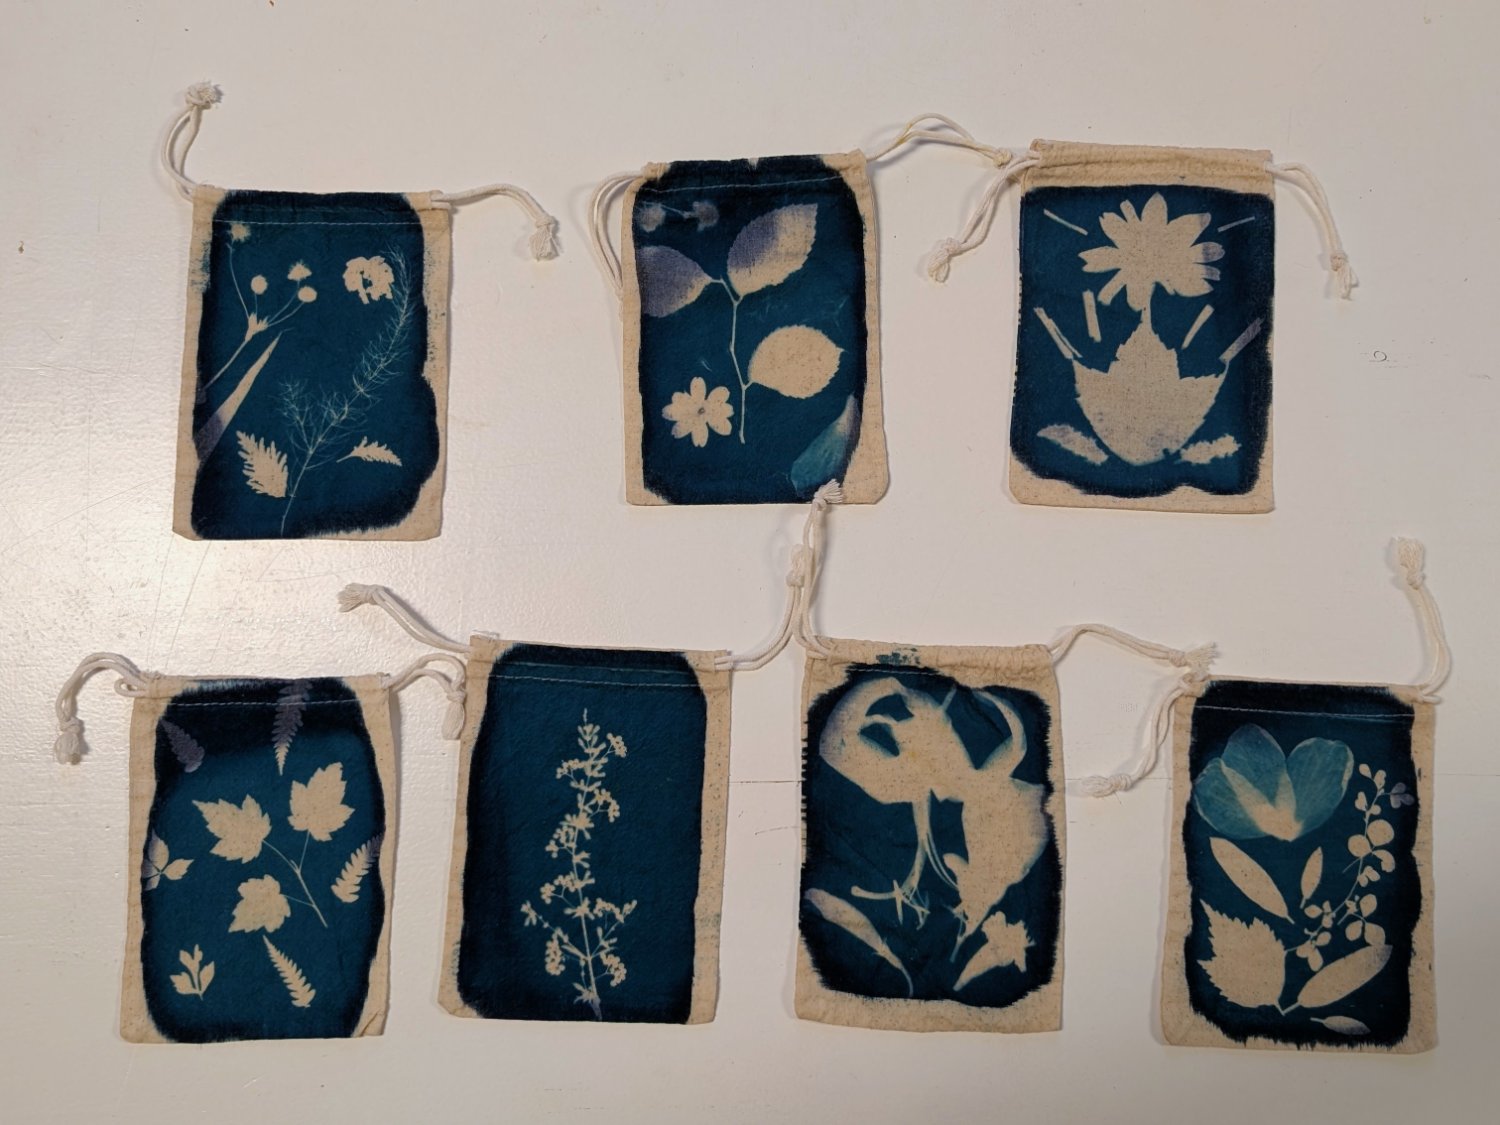
Several people used hibiscus flowers and the conditions and timing were perfect to show off the translucency.
Aside from the paper prints we do little drawstring bags, those ended up neat today as well. Sometimes it’s trickier to get a good exposure on them.
I was put off from ever experimenting on my own because of the poisonous chemicals, stopping at BW film development at home. How did you learn, and would that be something you’d recommend learning on your own from reading materials?
The chemicals used in cyanotype are very safe! Safer than traditional photo development, even B&W. I never wear gloves, even.
You can get started with minimal knowledge–all you really need to read is the directions on the back of the bottle. To lean the intricacies obviously takes a lot longer, mostly just experience and practice. Beyond the basics, when I have a question I’ll Google. Picked up some cool tidbits on Reddit. But mostly I just experiment!
Cool! I must have that mixed with another process - maybe palladium or something. I could swear there was one that used a cyanide compound, and the names probably got crossed in my brain.
Thank you! Time to search for an enlarger.
Ferric ammonium citrate and potassium ferricyanide. Don’t bathe in it but I’ve never had any irritation from splashes on my skin that I wash off, or from rinsing with no gloves (the final rinse is in plain water). Don’t mix it with a lot of acid (not sure why you would) because then it makes cyanide gas, but in the process of making cyanotypes, very very safe!
I’ve never used enlargers for this process. They’re exposed with UV light so you’d have to use a UV bulb with it and from my brief Google, there’s varying success. When I do photos, I print the negatives full size on transparency film and expose in the sun.
Damn that’s cool, those turned out great!
Could you share a little more for those of us who don’t know what this is?
Hell yeah! It’s an alternative photography process. You mix up a chemical emulsion and paint it on some watercolor paper (or fabric or wood or anything porous). Then you can arrange a composition on the paper with stuff like plants (what we focus on for this class) but other stuff like have or loose knit fabrics, objects with neat shapes, whatever. You can also take photos or do digital design and print out negatives on transparencies.
Once you’re ready to go, you expose them in the sun! There’s a lot of different factors in how long you expose them for–time of day, time of year, cloud cover, the thickness of your design materials, the pH of your paper or fabric, and a bunch of other stuff I know I haven’t learned about yet. In my class we watch everyone’s prints and I explain the different phases you can see them go through. I talk about what changes I’m looking for and factors I’m considering. I’ll tell each person when I think theirs is done and what has led me to that decision. It gets easier with practice, but I always tell people it’s a great art form for “recovering perfectionists” because I’m always learning something new.
Once they’re exposed, you just rinse in a plain water bath and you get that awesome blue. This was about 20 minutes after rinsing, but they continue to get deeper in color over the next day or so as the pigments oxidize.
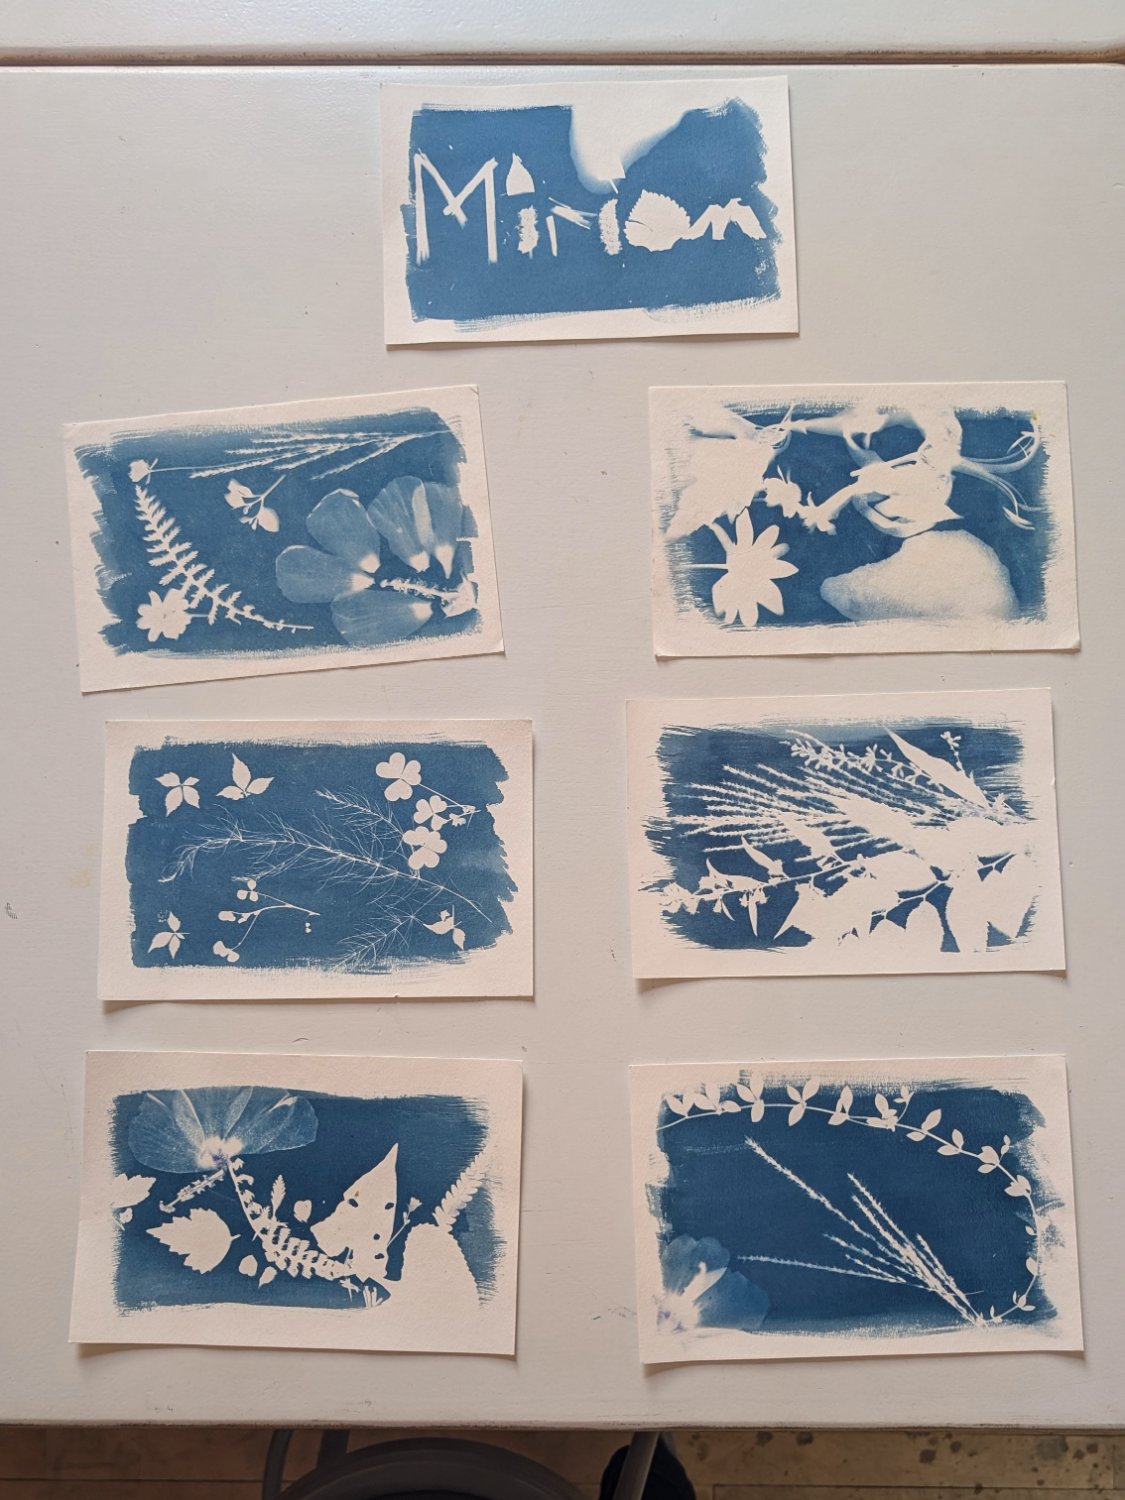
What ages? The Miriam is the only one that makes me think it’s younger kids, but I could still be wrong.
It was actually all adults except for Miriam, but that wasn’t her print–her dad made that one. 😅 Hers is in the row below on the right.
Those are gorgeous!
Comma splice.